PRODUCTS
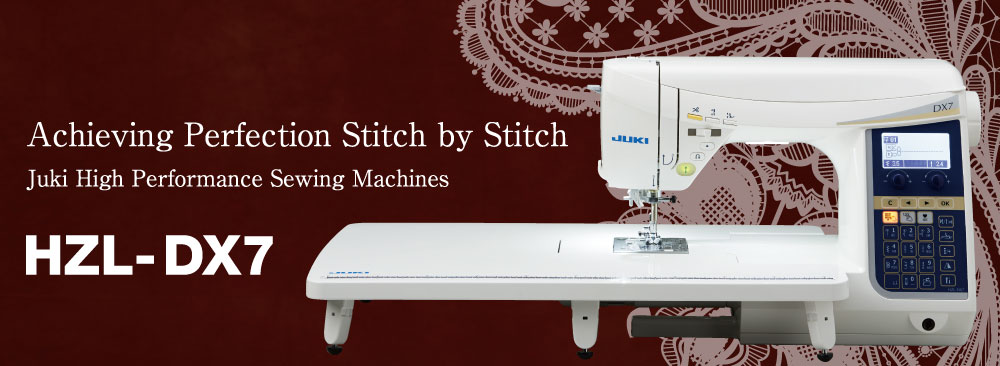
HZL-DX7
Sewing Machines that meet your needs to achieve perfection.
Enjoy the satisfaction of creating your own design while using high quality finishes.
Get the most out of your sewing experience with the New JUKI HZL-DX series and turn your creations into masterpieces.
Box Feed - JUKI Industrial Sewing Machine Technology
The JUKI industrial "BOX Feed" system has been brought to the home sewing machine. Our BOX Feed allows you to create perfect high-quality stitches on all types of fabrics.
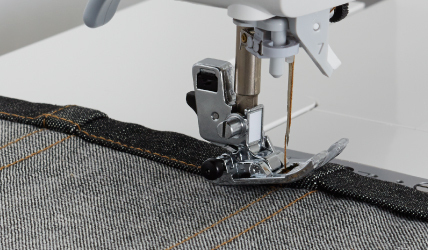
Thick denim folded into three layers for a flat fell seam
Evenly sews thick fabrics effortlessly.
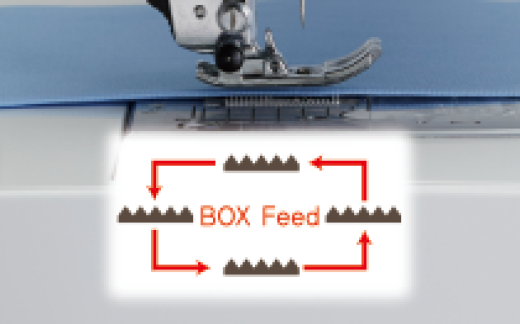
The BOX Feed system stays in contact with your fabrics longer for a consistent, reliable seam every time.
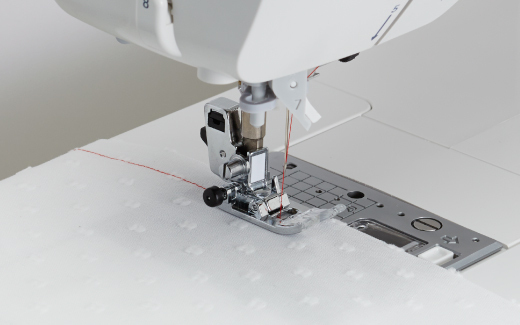
Stitching thin fabrics
No fabric shrinkage even sewing on light weight cotton.
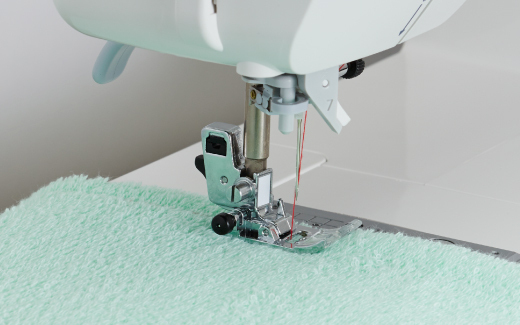
Stitching towel fabrics
Evenly feeds hard-to-sew high pile fabrics.
Straight Stitch Slide Plate【NEW】
Simply slide the front lever to switch to a single needle hole! Sew the lightest fabrics with perfect needle permeation. The single needle plate will not allow fabrics to be pushed into the needle hole. Free motion stitch with precision and perfection. Sew with confidence, when the single needle hole plate is set, only the straight stitch patterns can be selected.
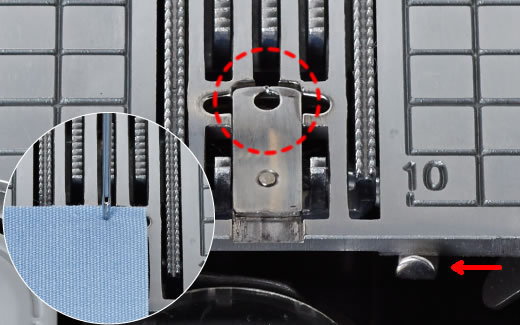
Needle hole for straight stitches
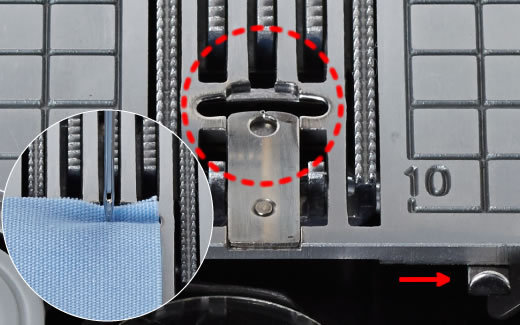
Normal needle hole
Float Function Prevents Uneven Seams【NEW】
By pressing the float button, you can sew with the presser foot slightly raised. By raising the presser foot to float you can sew fabrics without pushing layers or creating uneven seams.
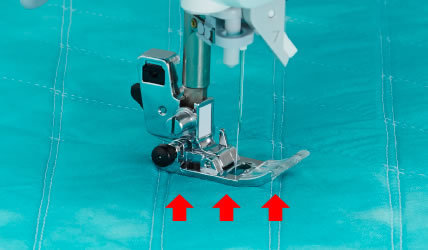
You can sew with the presser foot slightly floated.
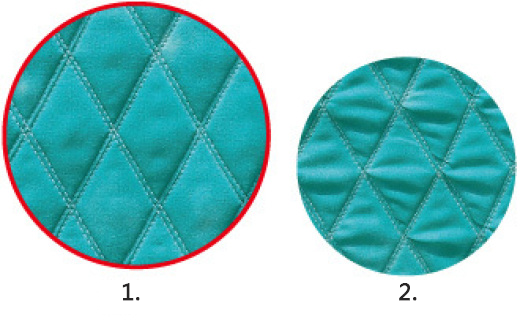
1.Using the float function, 2.Not using the float function
Pressure on layers create uneven seams.
*The standard presser foot is used in both cases.
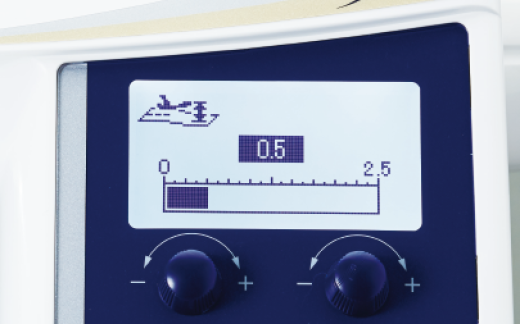
The height of the presser foot can be set in increments of 0.1mm, allowing delicate adjustment according to the materials.
Easily Create and Enjoy Beautiful Buttonholes with JUKI's Combination of industrial Background and Modern Technology
Use the buttonhole sensor system for optimal feed on all types od fabric. You will love the one step buttonhole as it measures and evenly sews on both the right and left sides. Automatically works in optimum order for a perfectly finished buttonhole.
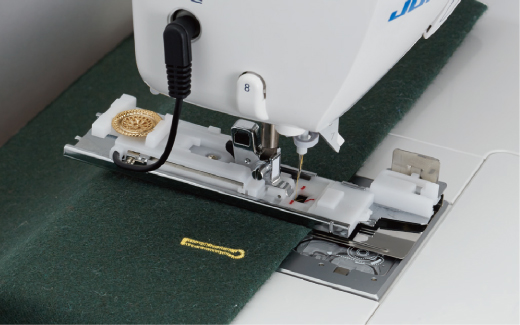
Buttonhole
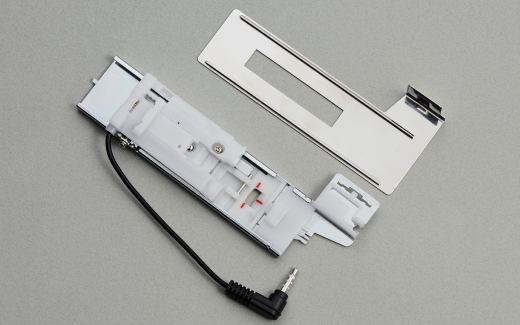
The buttonhole sewing presser foot contains a clamping plate, so you can confidently feed fabrics by holding them between the clamping plate and the presser foot.
◎16 types of buttonholes are available for your needs
1. Standard, 2. Keyhole, 3. For knit, 4. Decorative
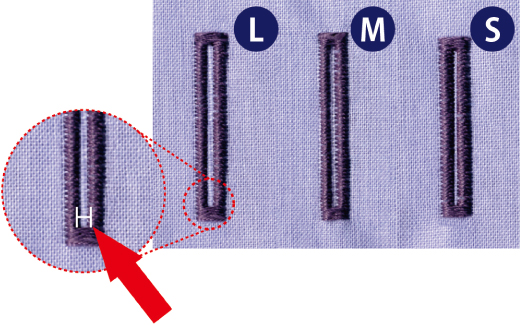
Cutting width adjustment of the buttonhole
Now it is possible to adjust the cutting width in 3 steps.
Customize Your Machine with even more New Functions!
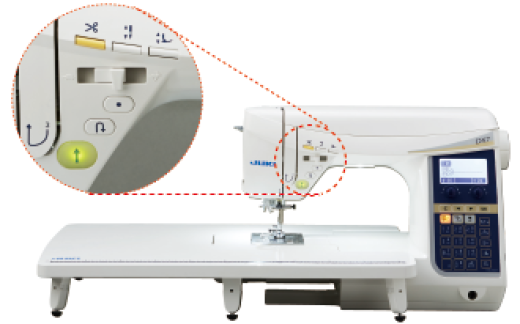
Easy-to-use Quick Select Buttons
・Start/Stop
・Reverse stitch
・Lock stitch
・Thread trimming
・Needle up/down
・Presser foot auto lift
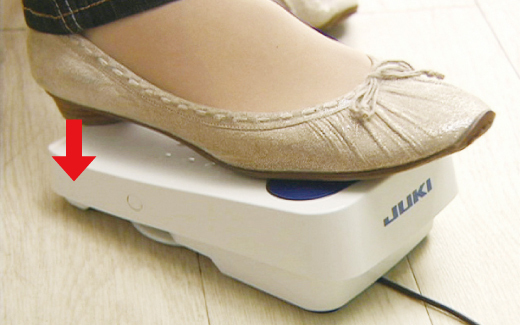
Foot Switch Function【NEW】
Allowing for greater versatility, Juki now offers assigned foot control options. With the ability to assign function to the heel side of the foot controller you can now lift the presser foot, trim threads, reverse stitch or single stitch by pressing on the heel side of the foot controller. Also allowing for no special settings you have complete control to customize your machine to best fit you.
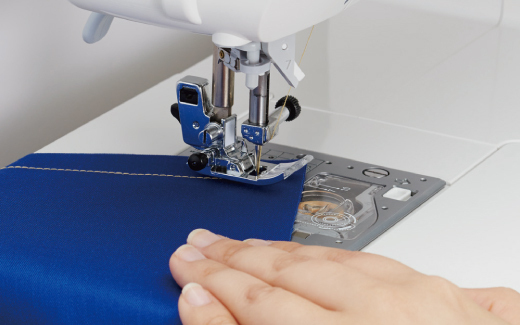
Presser Foot Pivot Function【NEW】
When you stop sewing, the needle stops in the down position and presser foot automatically lifts to allow for fabric movement. Sew corners or pivot with ease, when you resume sewing the presser foot automatically lowers for continuous smooth sewing.
*This function can also be switched off.
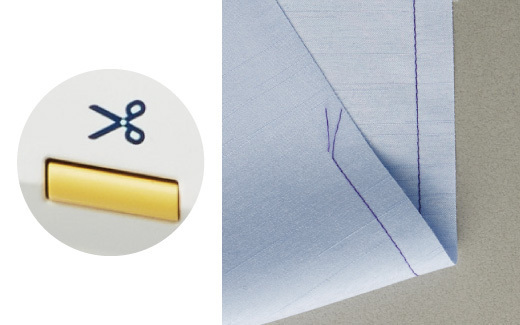
Setting of the Presser Foot Lifting After Thread Trimming【NEW】
Because the presser foot is automatically lifted after automatic thread trimming, you can quickly remove fabrics.
*This function can also be switched off.
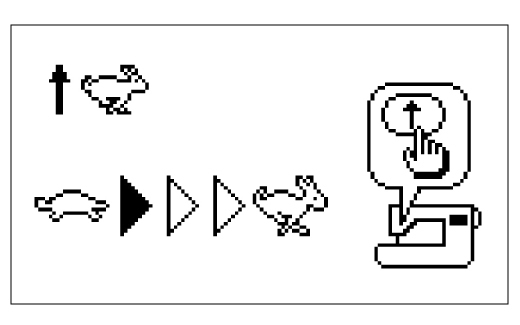
Adjusting Starting / Reversing Stitch Speed【NEW】
You can adjust the starting and reverse stitch speed between three steps of fast, normal, and slow.
Check the video reference for convenient assistance!
With the combination of assured automatic operation and fine manual control, you can enjoy ideal natural operation.
・Foot Switch Function
・Presser Foot Pivot Function
・Hassle-Free Operation
Click here!
https://youtu.be/m73u548uYC4
Create and Design with Precision and Perfection
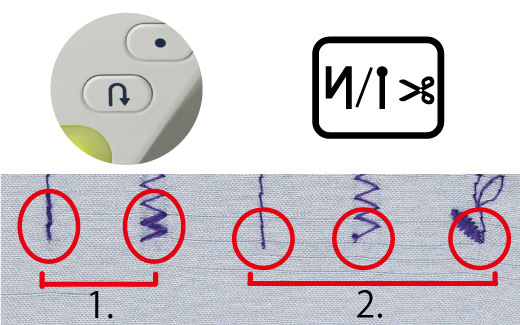
Lock Stitch【NEW】
For the lock stitch at the start and the end of sewing, you can choose two kinds of "1. Reverse Stitch" and "2. Lock Stitch". If you press the lock stitch button in the middle of sewing a pattern, the machine stops after sewing one cycle of the pattern.
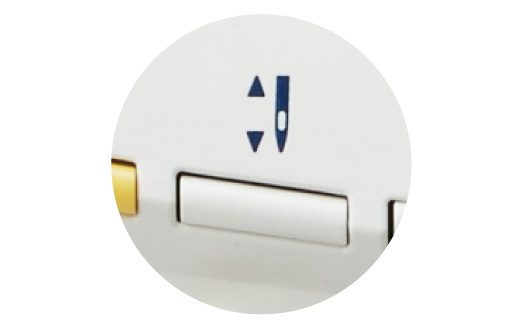
Low-Speed Inching Sewing【NEW】
By pressing and holding the needle up/down button, you can sew slowly. Sew corners, stops and starts with precision.

Speedy Straight Sewing【Speed-up】
With a maximum straight sewing speed of 1,050 stitches/min, you can sew fast.
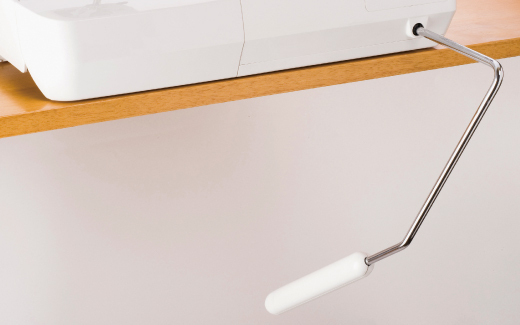
Knee-Lifting Lever
Presser foot can be raised and lowered by the knee-lifting lever. Presser foot lift is up to 0.5" (12mm) when the lever is used. When the foot is raised to the maximum height, you can also switch it back from automatic operation (button) to manual operation (lever).
Quick Preparation Makes Sewing a Breeze
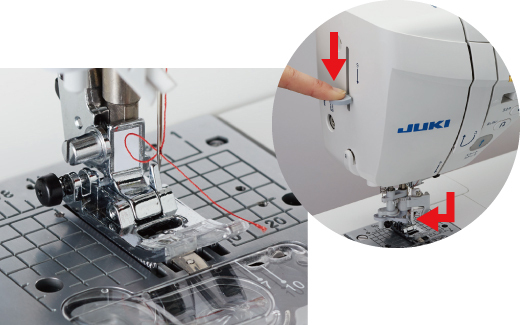
Automatic Needle Threader
Simply place the thread in the guide and lower the lever. Easily and quickly thread a needle with one hand.
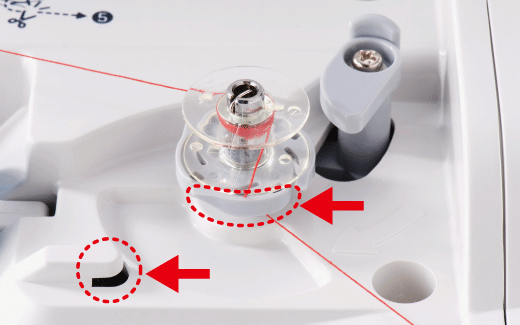
Bobbin Winder with independent Motor
To set up the bobbin for winding, simply wind some thread around the bobbin and pass it through the guide. You can wind the bobbin thread every time, and also use a cutter after winding.
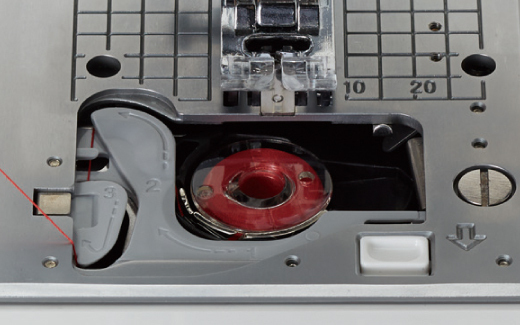
Quick Bobbin Preparation
The bobbin preparation is easy. Just follow the guide and it is not necessary to pull up the bobbin thread.
Enjoy the Freedom to Create and Design with Ease and Satisfaction
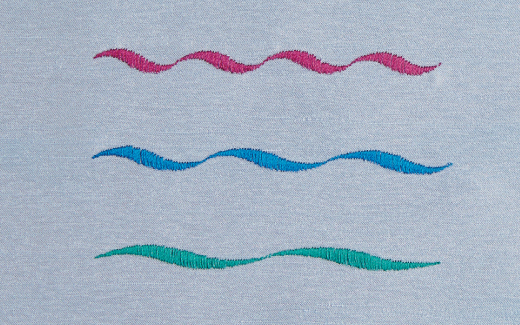
Elongation Pattern
Change the overall length without changing the sewing density of pattern.
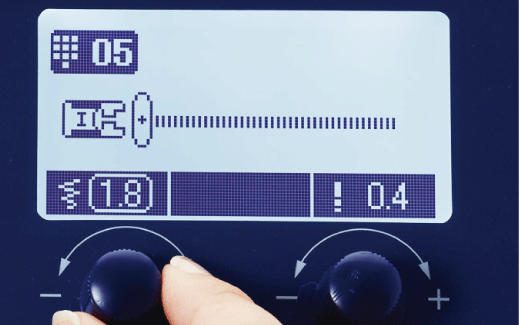
Stitch Adjustment Dial
Use the easy-to-operate dial to adjust the width and length of the stitch. The dial also lets you make slight adjustments while sewing zigzag stitches.
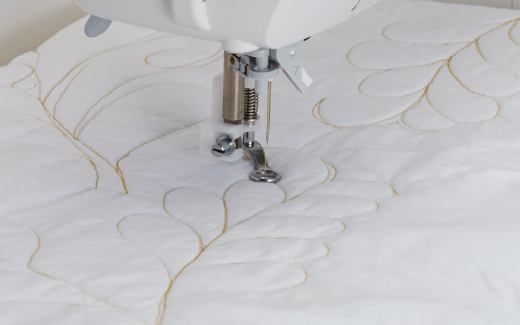
Free Motion
Flip the switch and drop your fed dogs. Enjoy both straight stitch and specialized zig zag for free motion. Adjust the presser foot height for easy movement. Enjoy the freedom of Free Motion.
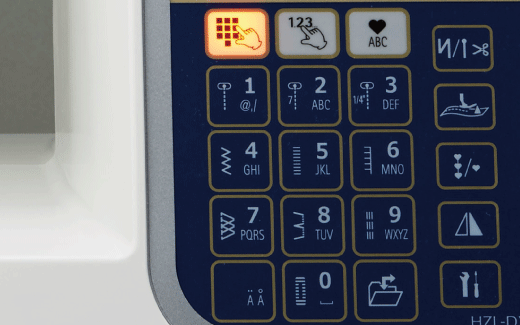
Direct Stitch Pattern Selection
Often-used sewing patterns such as straight lines, overcast stitches, and zigzag patterns can be quickly selected via direct buttons. You can also adjust the sensitivity of the touch panel.
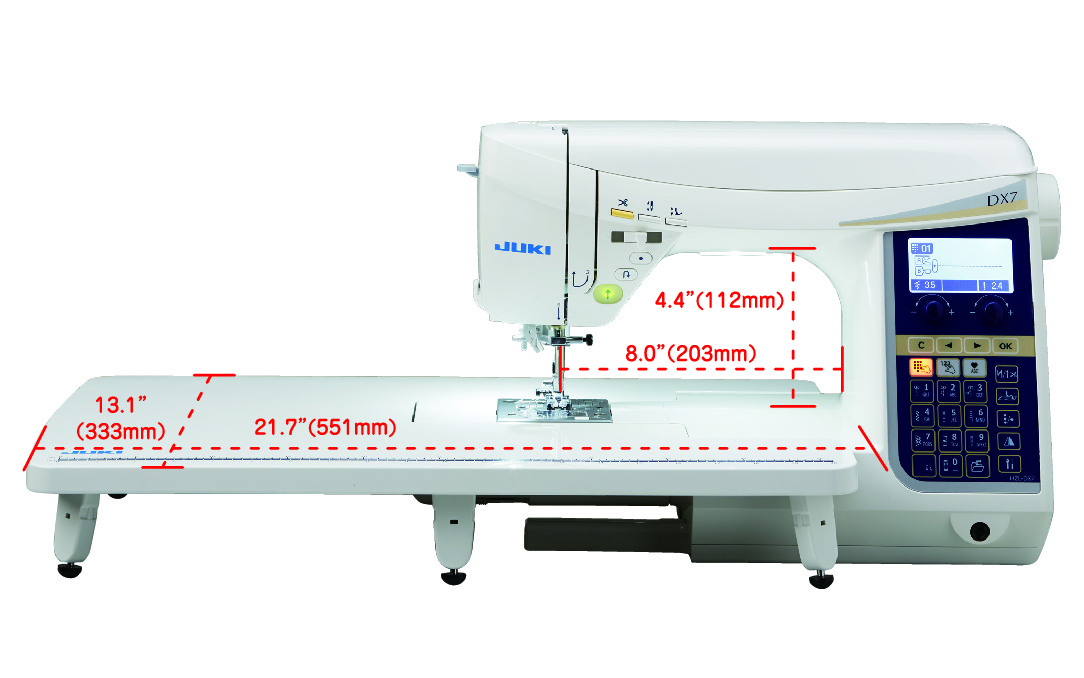
Large Sewing Space
Enjoy extra space and comfort by adding the accessory table while sewing or quilting.
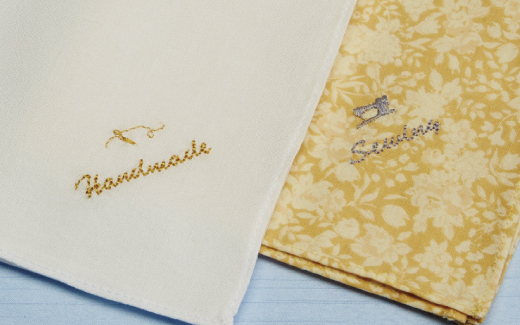
One-Point Patterns
The decorative patterns can be sewn as one point patterns. It is also lovely create an original tag by combining these patterns with the character stitches.
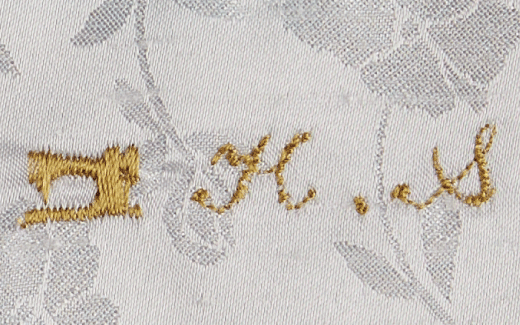
Character Stitch
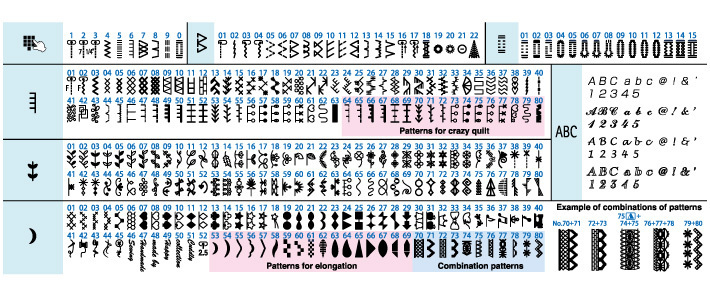
The machine includes four alphabetic/numeric fonts. Up to ten often-used patterns such as names and initials can be saved in the memory.
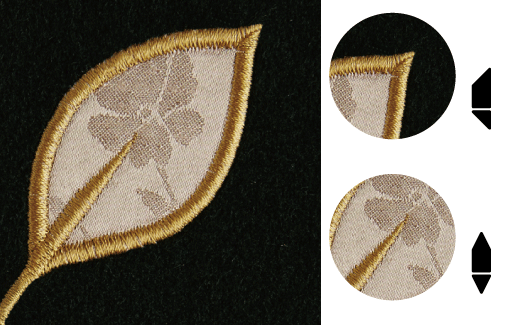
Corner Sewing of Applique
The stitch width of the needle can be set to automatically and gradually change to achieve a stitch that gives a beautiful finish even to the corner of an applique or the start /end of a line of sewing. By adjusting the width and length, you can also control the angles of your design.
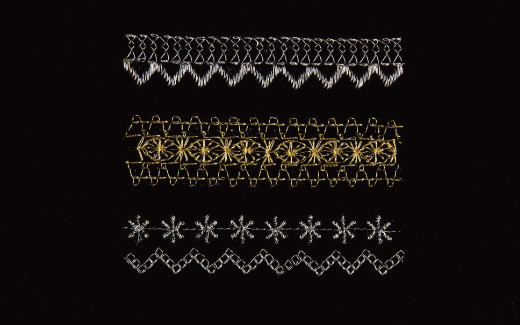
Lace Like Patterns
Sewing several patterns in parallel creates lovely lace-like stitches. You can enjoy the combination of patterns that give the image of dedicated lace braid.
タブコンテンツ2(オレンジ線下から)
SPEC / ACCESSORIES
| Control system(Arm size) | Computer (Arm Size 203㎜) |
| Dimensions | 445(W) x 291(H) x 210(D)mm |
| Weight | 10.3kg(21.6lbs) |
| Maximum sewing speed | 1,050 sti/min |
| Number of stitch patterns | 287 and Alphabetic/numeric fonts:4 |
| Buttonhole | Automatic (sensor system) with clamping plate Cutting width adjustment Buttonhole Length: 0.7 - 3.2cm |
| Direct stitch pattern selection | 〇 |
| Start/stop button | Green: Ready to start and/or while sewing Red: Not ready to start Orange: When the lock stitch button is pressed while the sewing machine is engaged in pattern sewing |
| Adjustable starting / reverse stitch speed | 〇 |
| Auto thread trimming | 〇 |
| Thread cutter | 〇 |
| Automatic needle threader | One hand |
| Thread tension system | Automatic |
| Needle up/down button | 〇 |
| Low-speed inching sewing | 〇 Press needle up/down button continuously |
| Needle stop position | Down |
| Needle stop position switching | 〇 |
| Lock stitch | Reverse stitch (Button system) Reinforcement stitch (Button system) Automatic lock stitch, thread trimming and presser foot lifting |
| Feed mechanism | 7 point feed dog BOX Feed |
| JUKI Smart Feed (dual feed function) | - |
| Presser foot pressure adjustment | Stepless adjustment |
| Auto presser foot lift system |
| Micro-lifter | spec_float_With |
| Function to straight-line stitching | Straight stitch slide plate |
| Presser foot pivot function | 〇 |
| Presser foot lift (1 step/2 steps) | Button system: 6mm Lever system: 6mm / 12mm |
| Horizontal presser foot holder button | 〇 |
| Drop feed | 〇 |
| Quick bobbin preparation | 〇 |
| Easy bobbin winding (Bobbin winder with independent motor) | 〇 |
| Bobbin thread detection | - |
| Stitch length | Dial system / LCD numerical display Max. 5mm |
| Stitch width | Dial system / LCD numerical display Max. 7mm |
| Number of needle position (straight stitch/other than straight stitch) | 37 / - |
| Pattern reverse | left/right |
| Twin needle sewing | 〇 |
| Lock mode | - |
| Elongation | 〇 |
| Save/call of patterns | 10 patterns |
| Light | 2 LED lights |
| Type of hook | Horizontal hook |
| Free arm | 〇 |
| Cord reel | - |
| Knee lifting lever | 〇 |
| Foot controller | with foot switch (6 functions selectable) |
| Wide table | 〇 |
| Accessory storage | Auxiliary bed/ accessories bag |
| Sewing machine cover | Hard case with accessory storage part |
| Operation support | DVD Operation guide |
| Supported languages | spec_light8lang |
| Accessories (presser feet) | Standard presser foot (A) Zipper presser foot (B) Overcasting presser foot (C) Blind stitch presser foot (D) Buttonhole presser foot (E) Manual buttonhole presser foot (I) Walking foot (N) Open toe presser foot (O) Patchwork presser foot (P) Quilt presser foot (Q) Edge Sewing presser foot (R) Smooth presser foot (T) |
| Other accessories_1 | Bobbin (4) Needle set HA X 1 #11(1):#14(1):#16(1):for knit #11 (1) Twin needle Quilt guide Auxiliary spool pin T-shape screwdriver Ripper Cleaning brush Spool cap (large) Spool cap(middle) Spool cap (small) Foot controller Knee-lifting lever Power cord Hard case Instruction manual Operation support DVD Eyelet punch Wide table |
| Other accessories_2 |
INCLUDED ACCESSORIES
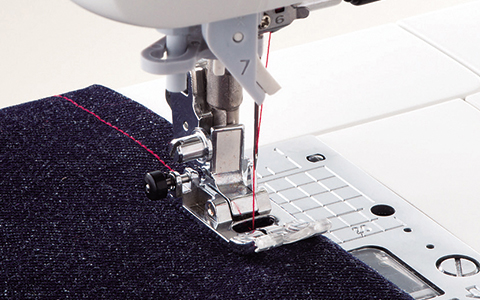
Standard Presser Foot
It can be used to sew lightweight to heavyweight materials.The wide needle entry opening allows this presser foot to be used for a variety of fabrics and applications, from straight stitches to zigzag stitches.Press the black button to keep the presser foot horizontal in order to smoothly begin sewing at a thick seam.
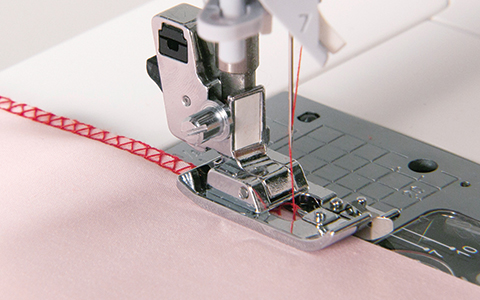
Overcasting Presser Foot (Overedge Foot)
Sew with the edges of the fabric aligned with the guide. The prong in the opening of the presser foot presses down the edge of the fabric to prevent puckering. In addition, the amount of thread going into the stitching is adjusted by the thread crossing the prong, creating a clean finish with little shrinkage. This presser foot cannot be used to sew zigzag stitches or overcasting by 3-point zigzag.
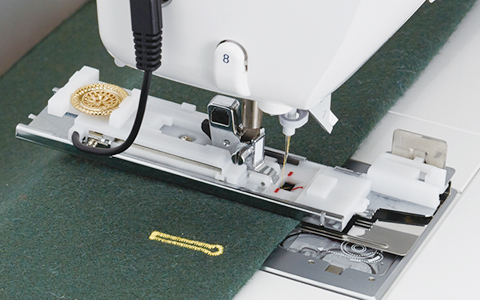
Buttonhole Presser Foot
You can sew buttonholes of the appropriate size by simply placing the button in the button holder of the presser foot.
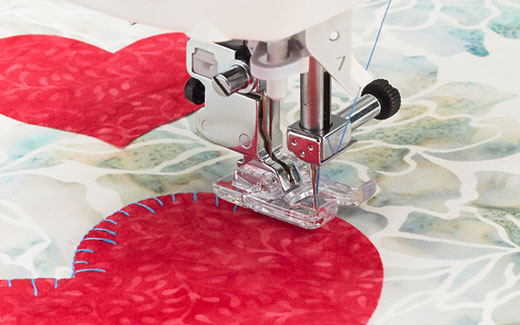
Decorate Stitch Presser Foot (Manual BH Presser Foot/Satin Stitch Foot)
The groove along the bottom of this presser foot ensures that the presser foot does not catch on the stitching, ensuring the fabric will be smoothly fed. Use to accurately sew a buttonhole near a thick seam that is hard to reach. Also Used to Manually Create Oversize Buttonholes.
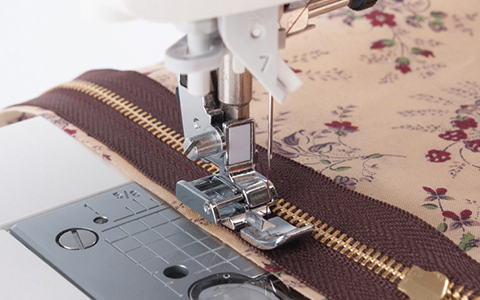
Zipper Presser Foot
Since this presser foot has a pin on the left side and on the right side for attaching it to the presser foot holder, you can attach this presser foot on either side of the needle, depending on which side of the zipper is being sewn. This presser foot can cleanly sew along the edges of the zipper without hitting the teeth.
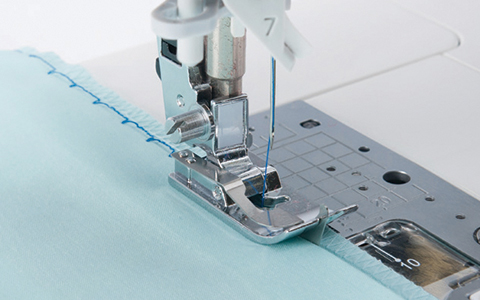
Blind Stitch Presser Foot (Blind Hem Foot)
By sewing with the fabric fold aligned on the guide of this presser foot,only a few threads of the fabric will be uniformly caught in the stitch. Adjust the needle entry point before sewing. You can also use this presser foot as a guide when changing the needle position for hemstitching in a straight line.
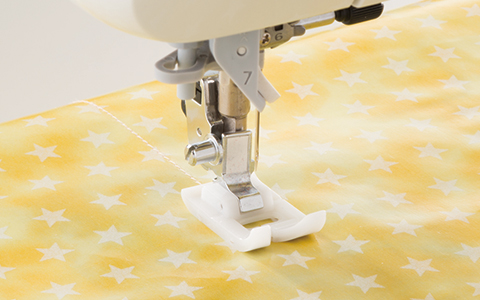
Smooth Presser Foot
This presser foot, made of a fluorocarbon resin, smoothly feeds even vinyl-coated material and leather fabrics which may stick to a standard presser foot and are difficult to sew.
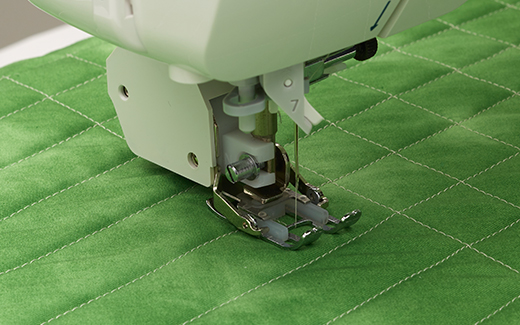
Walking Foot
This presser foot is equipped with an upper feed dog that works together with the feed dog of the sewing machine to feed the material in order to prevent bunched stitching and uneven feeding. By inserting the quilt guide bar, this presser foot can be used to quilt equally spaced seams.
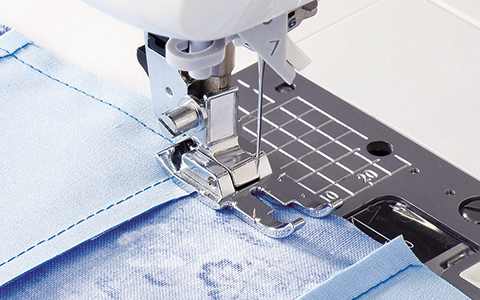
Patchwork Presser Foot
Always ensure needle is set to center straight stitch. Align the edge of the fabric with the outer presser foot guide for a seam allowance of 1/4" or with the inner presser foot guide for a seam allowance of 1/8". There are also marks at a 1/4" spacing at the front and back of the presser foot, allowing you to see the width of the seam allowance before and after needle entry.(Normal type and for JUKI Smart Feed.)
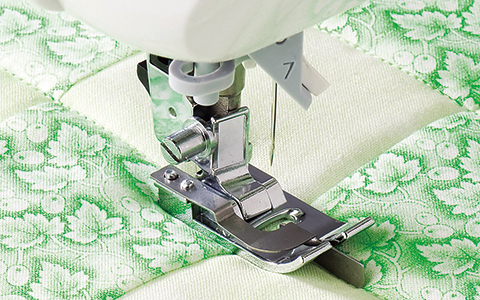
Ditch Sewing Presser Foot (Edge Sewing Presser Foot)
The long guide at the center of the presser foot fits perfectly in the seam line to stabilize stitching. You can also use this presser foot as a guide when changing the needle position for hemstitching in a straight line.(Normal type )
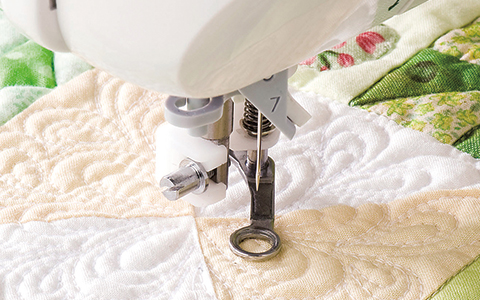
Quilt Presser Foot
With the feed dogs lowered, you can freely move the fabric to draw using stitching. Use the screw to adjust the height of the presser foot according to the thickness of the fabric, so the fabric moves smoothly.
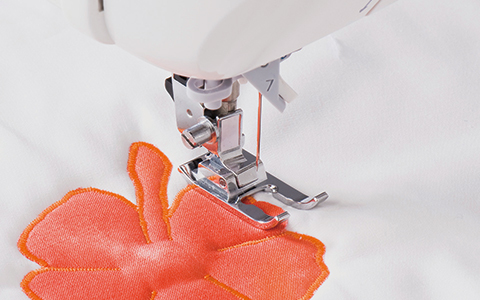
Open Toe Presser Foot
The wide opening at the front of this presser foot makes appliques and designs easy to see, which is useful for curvy decorative stitching. The groove along the bottom of this presser foot ensures that the presser foot does not catch on the stitching, so the fabric will be smoothly fed.
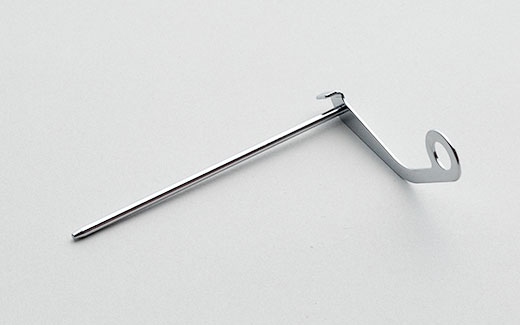
Quilt Guide
Insert this guide into the hole of the presser foot holder or the walking foot, and then sew while lightly tracing this guide along stitching. Adjust the spacing of the stitching by changing how far this guide is inserted. You can use this guide inserting from either the right side or the left side.
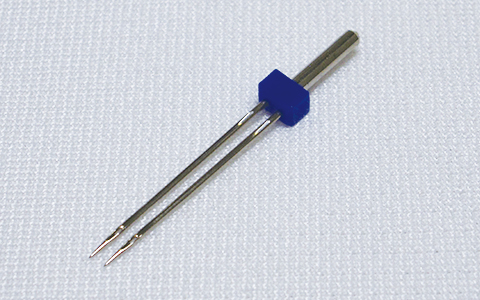
Twin Needle
For beautiful decorative stitches two threads can be a perfect addition. Also it is used for sewing pintucks with the pintuck feet. Set the sewing machines with 2 needle settings with optional functions. Not all stiches are approved for twin needle design.
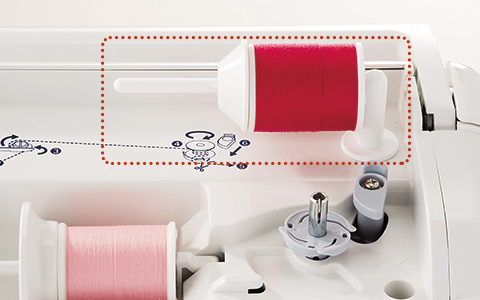
Auxiliary Spool Pin (Additional Spool Pin)
Use this spool pin with a thread spool for twin needle sewing, spare machine threading or bobbin winding.
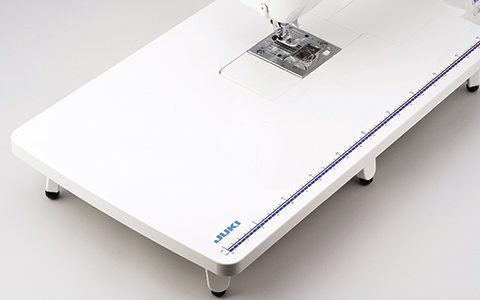
Wide Table
After removing the auxiliary bed, this table can easily be installed by fitting it into place.
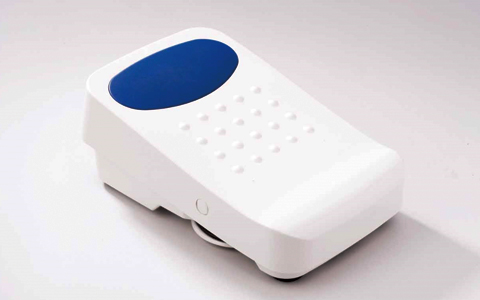
Foot Controller with Foot Switch Function
Controlling the sewing machine with your foot leaves both of your hands free while sewing. You can trim threads and or do another operations by pressing on the another switch of the foot controller.
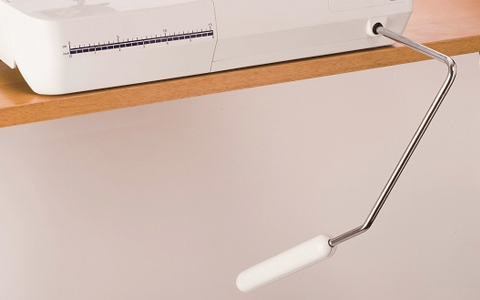
Knee-lifting Lever
Using your knee to push the lever to the right raises the presser foot,and when you return it will lower the presser foot.
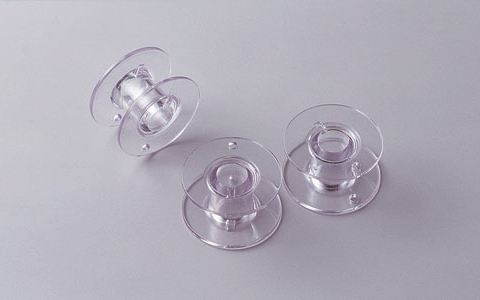
Bobbin(1pc)
Since the bobbin type differs depending on your sewing machine model,be sure to use the bobbin designed for your machine.
OPTIONAL ACCESSORIES
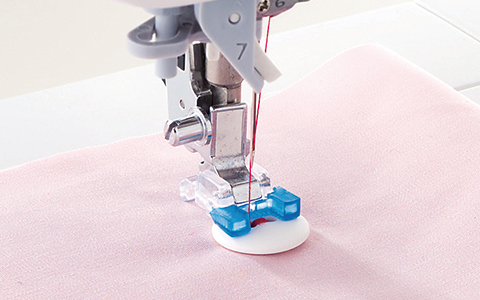
Button Attaching Presser Foot
Be sure to first lower the feed dog so the fabric is not fed and adjust the zigzag width so the needle enters the holes in the button. To create a shank for the button, insert an awl or another similar object into the groove in the presser foot before sewing on the button so that the stitching will create a loop suitable for the thickness of the fabric.
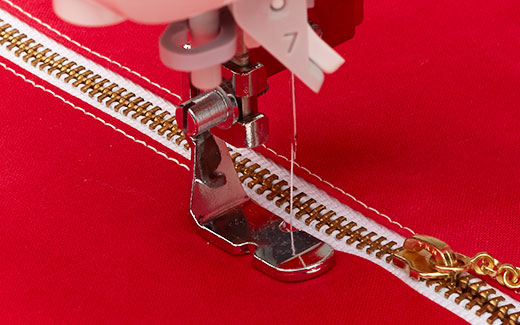
Adjustable Zipper Foot
The position of the adjustable zipper presser foot can be changed over to the right and left of the needle to allow the sewing machine to sew the material while avoiding its thicker part such as a zipper.
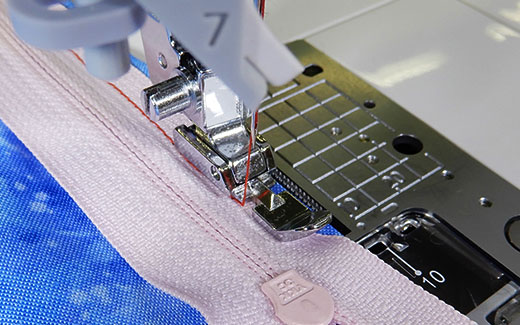
Narrow Zipper Foot
Since the width of the narrow zipper foot is small, the operator can easily observe the material during sewing. It has two (right and left)recesses on its undersurface, you can sew higher portions of the material while avoiding those portions. Both the right and left sides of the zipper can be sewn only by changing the position of the needle base line. The mounting portion of this presser foot is placed at its center, so the stable feed of the material is ensured.
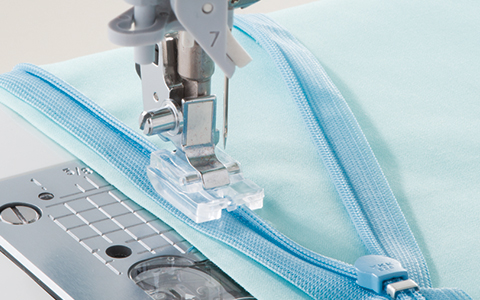
Invisible Zipper Foot
Since this presser foot lifts the teeth of the zipper as they are fed through the groove along the bottom of the presser foot, you can closely sew along the edges of the zipper teeth.
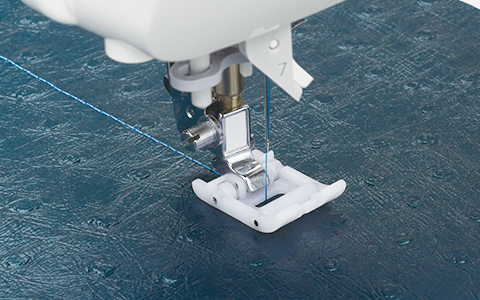
Roller Foot
The rollers at the front and back of this presser foot prevent it from sticking to or bunching fabrics for perfect seams.
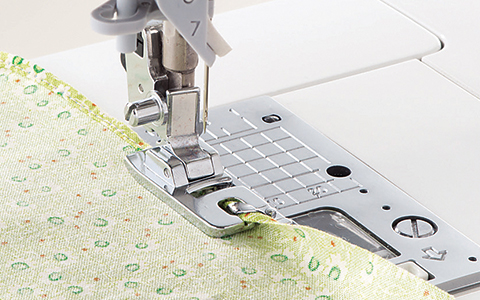
Rolled Hemming Presser Foot
The spiral guide of this presser foot rolls the edge of the fabric to create a narrow rolled hem. This presser foot can be used on light-weight to medium-weight fabric. Since the fabric can be uniformly folded twice without ironing, this presser foot is useful for finishing ruffles and handkerchief edges.
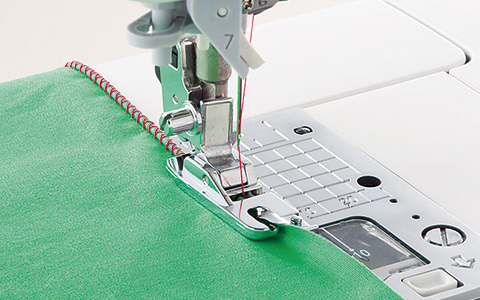
Hemming Presser Foot for Zigzag
The spiral guide of this presser foot rolls the edge of the fabric while the narrow rolled hem is sewn with a zigzag stitch. This presser foot can sew thin and solid edging.
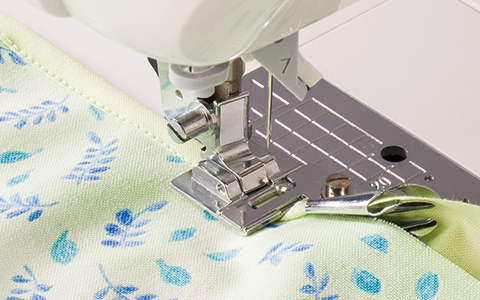
Binder Presser Foot
After tape with a width of about 0.75" to 1.0" (22 to 25 mm) is passed through the guide, this presser foot creates double-fold tape with a width of about 0.2" (5 mm) and sews it to bind the fabric. Single-fold tape with a width of about 0.4" to 0.5"(10 to 13 mm) can also be used. You can move the guide to the left or right to adjust the needle entry point.
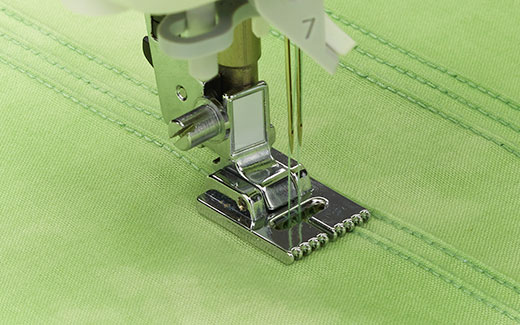
Pintuck Foot Narrow
When sewing pintucks in parallel, the 9 slits on the bottom of the presser foot can be used as a guide. Pintucks are suited to light-weight soft materials. Pintucks of stable shape can be produced while putting a cord in each pintuck.
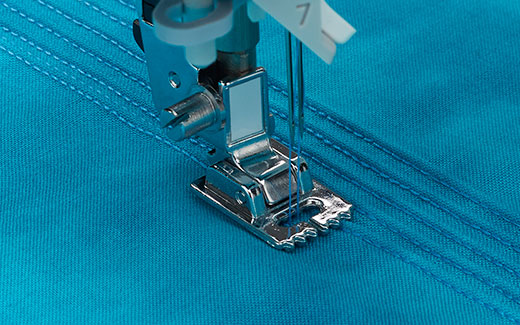
Pintuck Foot Wide
When sewing pintucks in parallel, the 7 slits on the bottom of the presser foot can be used as a guide. Pintucks are suited to light-weight soft materials. Pintucks of stable shape can be produced while putting a cord in each pintuck.
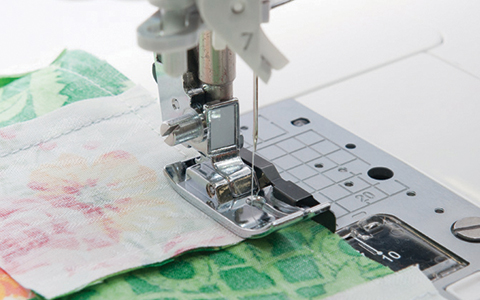
1/4“ Guide Foot
Always ensure needle is set to center straight stitch. Align the edge of the fabric with the presser foot guide to easily sew with a seam allowance of 1/4" (6.4 mm). Since the needle drops into a small round opening, the seam is stabilized to create a perfect straight stitch.
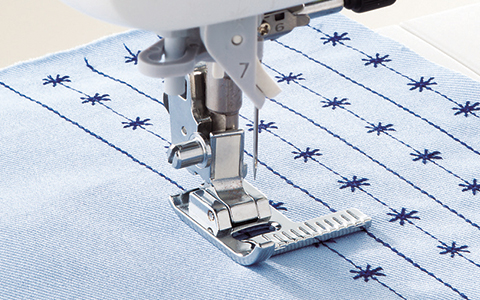
Presser Foot with Guide
On the right side of the presser foot, there are guidelines at a 2 mm spacing from 0 to 2 cm from the center of the needle entry opening (center needle position). This presser foot is useful when sewing parallel straight or decorative stitching.
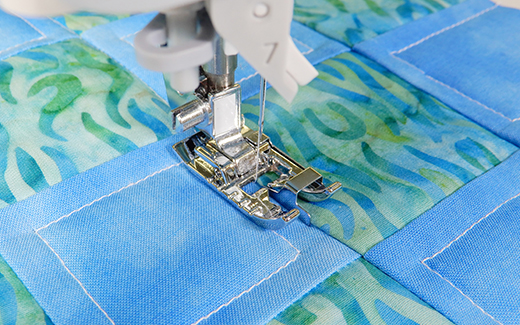
Compact Guide Edge Sewing Foot
This presser foot has a shorter guide at its center. With this shorter guide, smoother feed of the material is promised. Furthermore, it is expected to reduce uneven material feed. The marks on the left side of the presser foot will be the guide for the outline quilting. By changing the needle base line, you can sew the single lap stitching with ease.
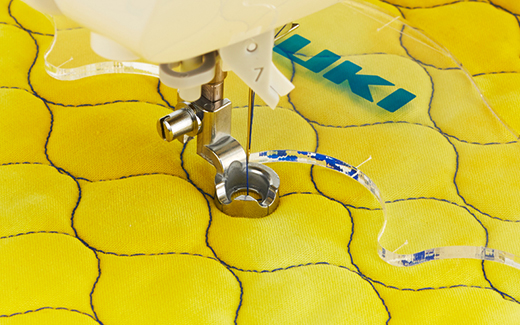
Quilt Presser Foot (for Ruler)
With a distance of 1/4" (6.5 mm) from the needle entry point to the outer edge of the presser foot, sew using a ruler as a guide. The front of the presser foot is lowered, making it easier to see the needle area. Adjust the height of the presser foot according to the thickness of the fabric.
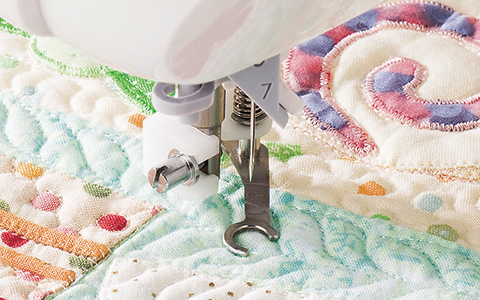
Quilt Presser Foot (Open Type)
Use the screw to adjust the height of the presser foot according to the thickness of the fabric, so the fabric moves smoothly.
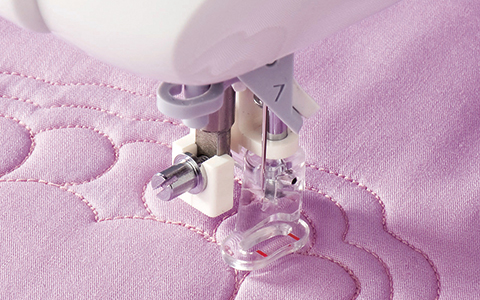
Quilt Presser Foot (Zigzag Type)
The wide needle entry opening allows this presser foot to be used for free-motion sewing with zigzag stitches. Since the presser foot moves up and down together with the movement of the needle, thick seams can easily be crossed.
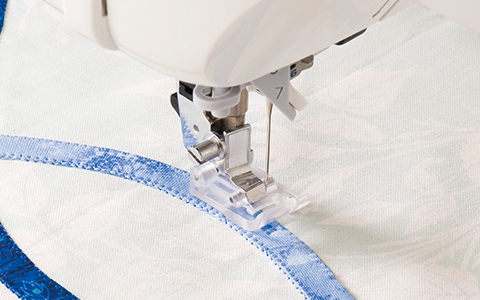
Applique Presser Foot
Since the front and back of this presser foot are short and transparent, appliqu?s and designs are easy to see, and you can easily sew sharp curves. The pin at the back keeps the presser foot horizontal, stabilizing it even when sewing appliqu?s.
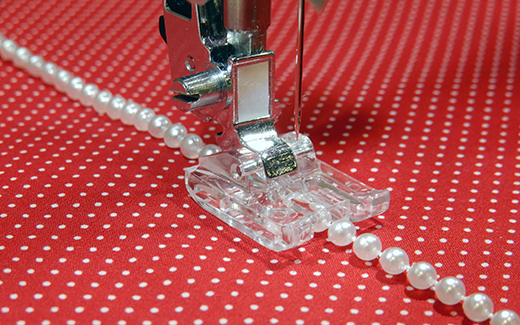
Pearl Attaching Presser Foot
Pass the strand of pearls or beads up to a diameter of 4 mm through the dome-shaped groove in the center of the presser foot, and then sew with a zigzag stitch. This presser foot can also be used for sewing on thick cording, braiding or piping cord, even on curves.
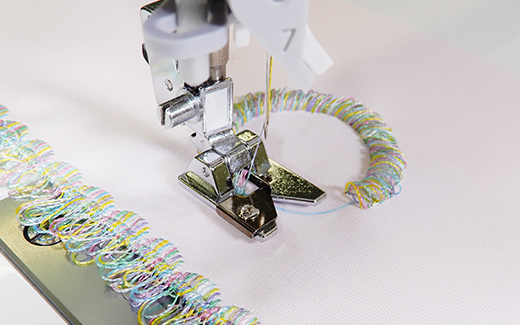
Fringe Foot
This foot has a claw at its center. It is used for forming loops by laying the thread over the claw. This presser foot can be used for sewing decorative stitches on workpieces by making three-dimensional thread loops and fringes on the edge of the fabric with your favorite threads.
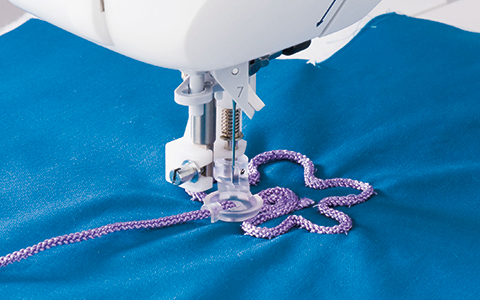
Cording and Embroidery Presser Foot
This presser foot has a hole for supplying cording to be sewn over. With the feed dog lowered, you can freely move the fabric to create simple embroidery with cording.
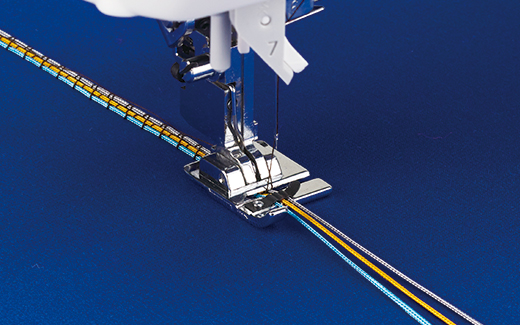
Cording Presser Foot (for 3 Cords)
Pass threads through the three channels in front of the needle entry opening and sew them with the three-point zigzag stitch or decorative stitches in order to create three-dimensional decorations.
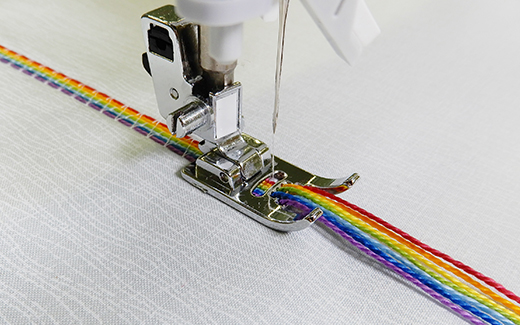
7 Hole Cording Foot
This presser foot is provided with seven cord insertion holes of approximately 1 mm in diameter. As many as seven (1 to 7) thin cord(s) or embroidery thread(s) can be sewn using these holes while neatly arranging them in parallel (in the case of two or more cords / threads are used).
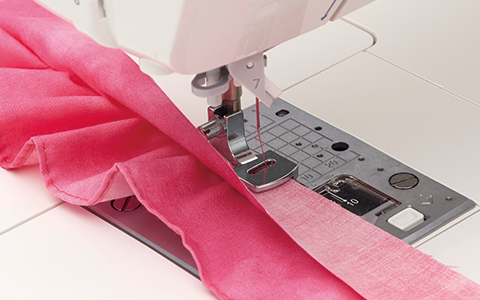
Gathering Foot
Change the stitch length, thread tension and presser foot pressure to adjust the amount of fabric that is gathered. You can also use this presser foot to sew two pieces of fabric together while creating gathers in only the lower piece.
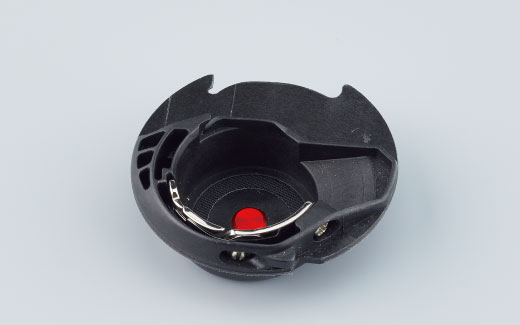
Dedicated Hook for Thick Thread Decoration
Wrap the thread you want to decorate around the bobbin and draw a pattern with pattern stitching or free motion.
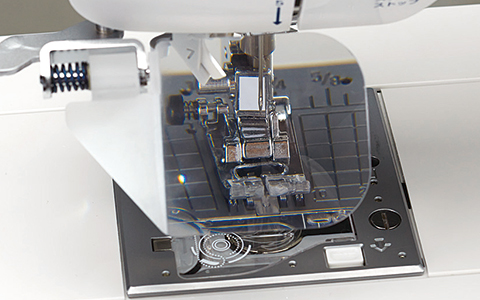
Stitch Area Magnifier
This is useful for viewing the needle area or performing intricate operations.
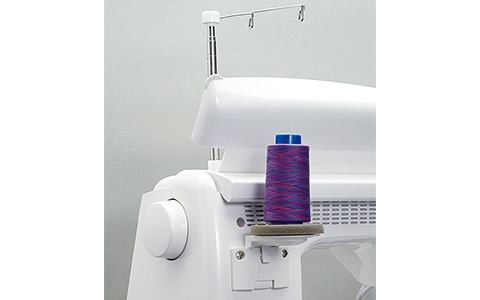
Thread Stand
The specially designed thread guide that is also installed smoothly pulls the thread straight up. When placing the hard case on the sewing machine, this thread stand and thread guide can be removed in a single step.
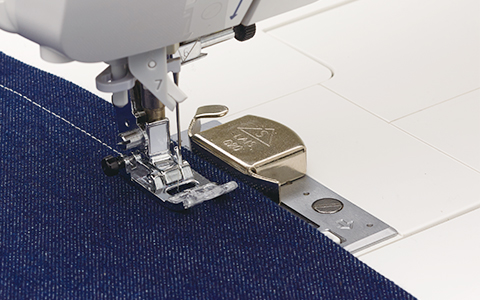
Magnetic Gauge
A strong magnet holds this gauge in place on the needle plate. This gauge can also be used on household sewing machines with a metal needle plate.
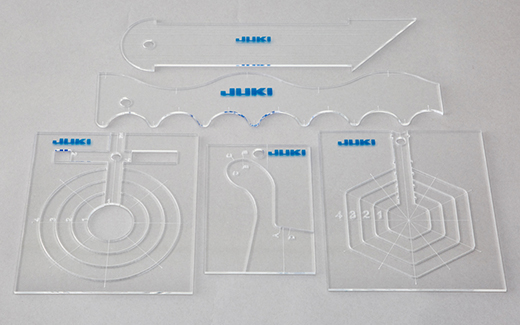
Ruler Kit (HZL type)
Various patterns can be formed by combining basic lines and shapes. This kit contents straight, wave, hexagon, circle, feather shapes. Be sure to use this kit together with the presser foot for ruler. The thickness of these rulers are 3mm.
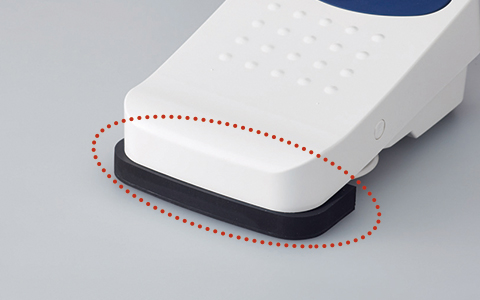
Foot Switch Stopper
Installing this stopper on the foot controller disables the function that is activated by stepping on the controller with your heel.
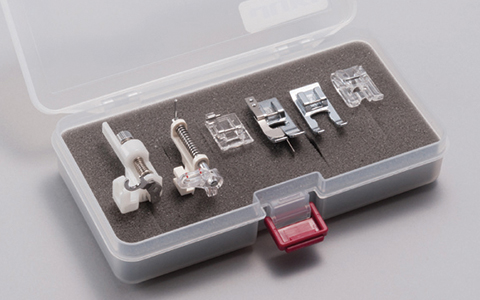
Advanced Quilter's Kit
This set contains the following: Edge Sewing Presser Foot, Quilt Presser Foot (Open Type), Quilt Presser Foot (Zigzag Type), Open Toe Presser Foot, Applique Presser Foot, Pearl Attaching Presser Foot
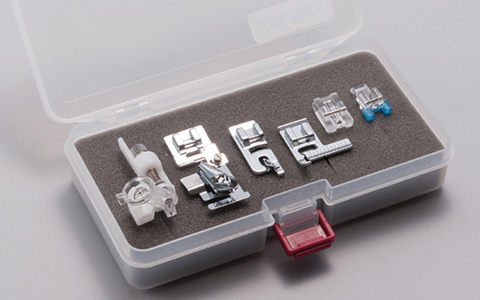
Heavy User Kit
This set contains the following: Button Attaching Presser Foot, Invisible Zipper Foot, Rolled Hemming Presser Foot, Binder Presser Foot, Presser Foot with Guide, Cording and Embroidery Presser Foot
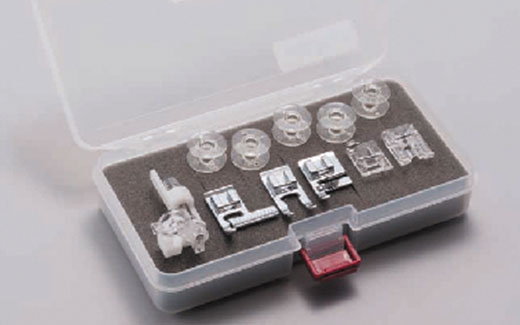
Creative Set
This set contains the following: Applique Presser Foot, Cording and Embroidery Presser Foot, Pearl Attaching Presser Foot, Cording Presser Foot (for 3 Cords), Presser Foot with Guide, Open Toe Presser Foot, Bobbin x5
タブコンテンツ3(オレンジ線下から)
STITCH PATTERNS
SEWING SAMPLES
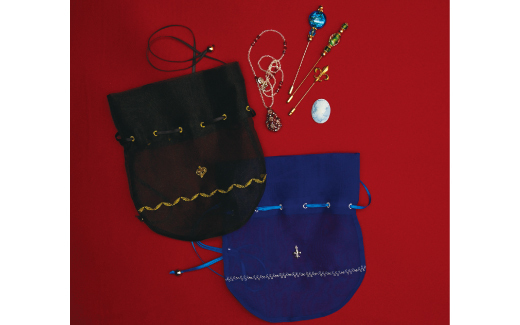
Accessory cases
Add decorative stitches while using a variety of specialty threads.
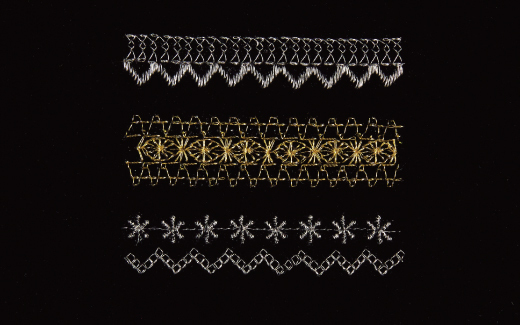
Lace-patterned sampler
Sew Decorative patterns in parallel to form new stitch designs.
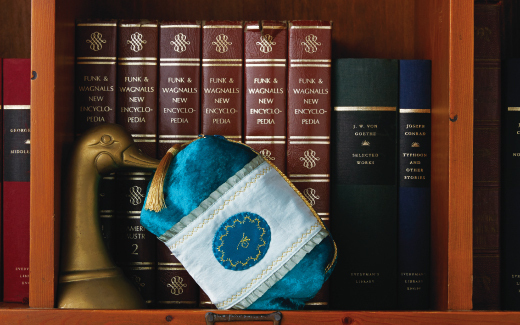
Emblem pouch
Create a one-point floral stitch surrounded by decorative patterns.